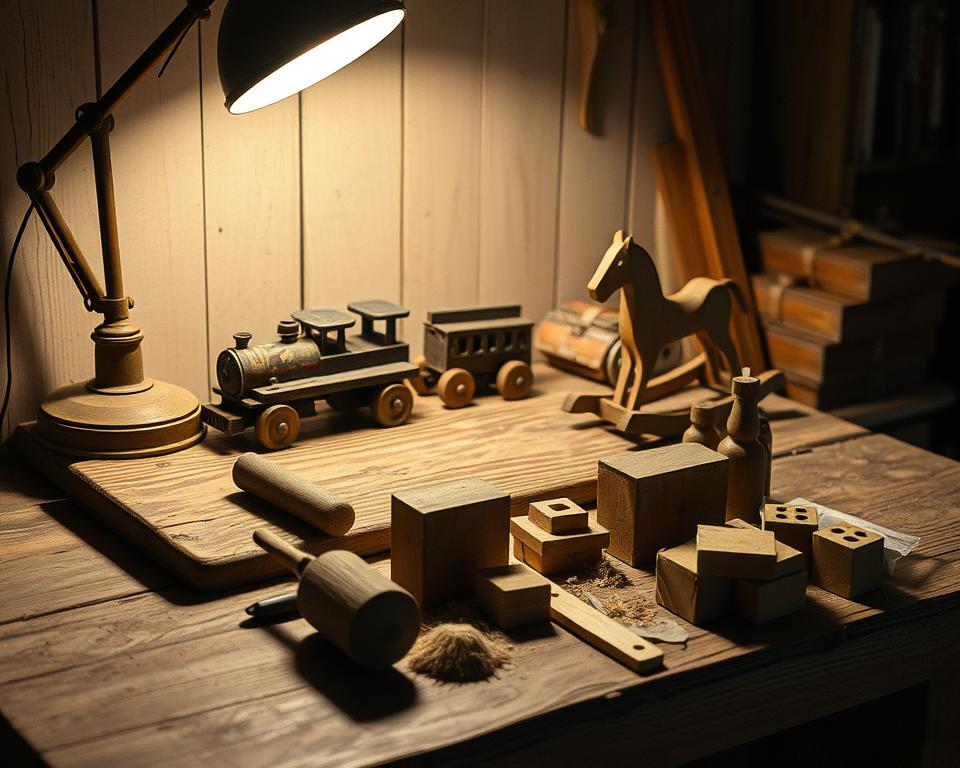
Do you have cherished wooden toys that have lost their shine? Before tossing them aside, consider a gentle restoration instead. Many beloved heirlooms and childhood treasures can regain their glow without harsh stripping or refinishing.
According to expert Jeff Jewitt, most wooden toy finishes can be revived with simple techniques and the right products. This process saves time, preserves sentimental value, and keeps kids safe with non-toxic methods. Plus, it’s an eco-friendly way to extend the life of your wooden furniture and toys.
Key Takeaways
- Restore wooden toys without stripping for a quicker, safer solution.
- Expert techniques bring back shine while preserving sentimental value.
- Non-toxic methods protect children and the environment.
- Gentle care keeps wooden toys looking new for years.
- Refinishing is messy—reviving finishes is often the better choice.
Why Restoring Wooden Toys Matters
Generations of laughter and love live in those scratched wooden surfaces. Unlike plastic, these toys age with character, each mark telling a story. Restoring them preserves more than gloss—it safeguards memories.
The Emotional Value of Well-Loved Toys
Think of Grandpa’s handmade rocking horse or your child’s first block set. Like fine furniture, these pieces become family heirlooms. Museums use gentle techniques to protect antique toys—and you can too.
Simple maintenance keeps their history alive. A cleaned-up dollhouse or polished train set can last for years, ready for the next generation to cherish.
How a Refreshed Finish Extends Their Lifespan
Dirt and sunlight speed up wear. A quick polish prevents sun damage and hides minor scuffs. It also adds a protective layer against spills and sticky fingers.
Restoration is cheaper than replacement. With care, that faded teddy bear can regain its charm—no harsh chemicals needed. Just love, patience, and a soft cloth.
Assessing Your Toy’s Condition
Before diving into restoration, take time to check your toy’s condition. A careful look helps you choose the right step—whether it’s a quick clean or a full repair. Start by examining it under bright light to spot hidden scratches or grime.
Identifying Scratches and Wear
Surface-level issues like light dirt or minor scuffs are easy fixes. Use the fingernail test: if the finish feels smooth and intact, a polish might be enough. Deep cracks or flaking paint mean more work.
Jeff Jewitt’s solvent test helps identify finish types. Rub a cotton swab with alcohol or lacquer thinner on a small area. If the finish dissolves, it’s shellac or lacquer—gentle cleaning is safe.
When to Restore vs. Refinish
Restore if 70% of the finish remains. For severe damage, like chipped paint or warped wood, refinishing is the better task. Here’s a quick guide:
- Restore: Light dirt, small scratches, or faded shine.
- Refinish: Peeling paint, deep cracks, or water stains.
This level of care ensures your toy stays safe and beautiful for years.
Gathering Your Safe Restoration Tools
The right tools make all the difference when bringing wooden toys back to life. With kid-safe supplies, you’ll clean, polish, and protect without risking health or sentimental value. Here’s what to reach for—and what to avoid.

Non-Toxic Cleaners for Gentle Care
Skip store-bought sprays with unknown ingredients. A mix of white vinegar and water (1:1 ratio) lifts grime naturally. Mild dish soap diluted in warm water works too. These cleaners are safe for little hands and the planet.
Soft Cloths and Brushes
Microfiber cloths (like BBIndustriesLLC’s) wipe away dirt without scratching. Pair them with soft-bristle brushes for crevices. Avoid steel wool or rough sponges—they strip finishes.
Natural Polishing Compounds
Beeswax polish nourishes wood and adds a protective shine. Olive oil blended with lemon juice revitalizes dry surfaces. These materials are edible-grade, so accidental contact won’t harm kids.
Pro Tip: Keep a toolkit with lint-free cloths, cotton swabs, and diamond-dry polishing pads for precision work. Steer clear of harsh chemicals like ammonia or bleach—they damage wood and leave toxic residues.
Step 1: Gentle Cleaning for a Fresh Start
A clean surface is the foundation of any successful wooden toy restoration. This step removes years of dirt and grime without harming the wood’s natural beauty. With the right tools and patience, even the grimiest piece can look like new.
Removing Grime Without Damaging the Wood
Start by dusting with a soft microfiber cloth or repurposed makeup brush. For carved details, a soft toothbrush lifts dirt from grooves. Avoid scrubbing—gentle circular motions protect the finish.
For stuck-on grime, try using safe clay barring. This technique lifts contaminants without chemicals. Just knead and glide the bar over the surface. It’s a museum-approved trick for delicate items.
DIY Cleaning Solutions to Avoid Harsh Chemicals
Mix 1 part white vinegar with 2 parts water and a drop of dish soap. This pH-balanced cleaner cuts through grime naturally. Test it on a small area first to ensure compatibility.
For tougher stains, baking soda paste (soda + water) works wonders. Apply, wait 5 minutes, then wipe. Always dry toys thoroughly to prevent warping. Learn more about sanitizing wooden toys safely.
- Pro tip: Use lint-free cloths to avoid streaks.
- Store cleaned toys in a dry place to maintain freshness.
Step 2: Repairing Minor Scratches
Small scratches don’t mean the end for your wooden toys—simple fixes can bring them back to life. With natural ingredients and gentle techniques, you can restore their smooth appearance without harsh chemicals.
Natural Fixes for Tiny Imperfections
For light scratches, try rubbing walnut meat into the mark. The natural oils fill gaps and darken the area to blend seamlessly. Baking soda mixed with water also works—this mild abrasive buffs out shallow scuffs without damaging the finish.
Sanding Safely for Deeper Marks
If scratches persist, sanding may help. Use 220-grit or finer paper and move with the wood grain. Wet sanding (lightly dampening the surface) reduces dust and prevents over-sanding. Remember: less pressure preserves the toy’s original shape.
- Buff gently: After sanding, apply beeswax compound to restore smoothness.
- Avoid power tools: Hand sanding gives better control for delicate toys.
These methods keep repairs kid-safe and eco-friendly, ensuring your toys stay cherished for years.
Step 3: Reviving Dull Finishes with Polishing
Polishing brings back the magic in well-loved wooden toys. With the right polishing techniques, even the most worn pieces can regain their shine. This step is quick, safe, and delivers stunning results.

Choosing the Right Polish for the Finish Type
Match your polish to the toy’s original finish. Beeswax works wonders on oil-finished toys, while carnauba wax suits lacquered surfaces. For deeper penetration, warm the polish slightly before applying.
Matte finishes keep vintage charm intact, while glossy gloss adds modern vibrancy. Test a small area first to ensure compatibility.
Buffing Techniques for a Smooth, Shiny Result
Use a microfiber cloth to buff in small, circular motions. This method builds shine gradually without streaks. Apply light pressure—let the polish do the work.
One parent shared, “After polishing, my son’s train set looked factory-new!” Consistent buffing ensures long-lasting gloss and protection.
- Pro tip: Store polished toys away from direct sunlight to maintain their luster.
- Reapply wax every 6 months for ongoing protection.
Step 4: Protecting the Restored Surface
Now that your wooden toys look fresh, let’s lock in that beauty. A protective layer shields against spills, sticky fingers, and everyday wear. Choose products that are safe for kids and kind to the environment.
Food-Safe Waxes and Oils
Organic beeswax or coconut oil adds a edible-safe shine. These natural options nourish wood without harsh chemicals. Apply thin coats—thick layers attract dust and feel sticky.
For lacquered toys, food-safe mineral oil works wonders. Ceramic coatings offer advanced protection for high-traffic pieces. Always test a small area first.
Reapplication for Lasting Results
Regular maintenance keeps toys looking their best. Reapply wax every 3–6 months, depending on play frequency. Use BBIndustriesLLC’s diamond-dry pads for ultra-smooth sealing.
Store toys away from direct sunlight to prevent fading. With proper care, your restored treasures can last for years. A little effort now saves time and sentimental value later.
- Pro tip: Label your polish dates to track reapplication.
- Wipe toys with a dry cloth weekly to maintain shine.
Maintaining the Shine Long-Term
Keeping wooden toys looking their best requires simple, ongoing care. With a few smart habits, you can prevent damage and preserve their renewed gloss for years. Here’s how to make regular maintenance effortless.
Smart Storage Solutions
Where you store toys matters. Fabric-lined bins cushion surfaces and minimize scratches. Avoid damp areas to prevent warping.
For UV protection, keep toys away from sunny windows. Rotate favorites to distribute wear evenly across your collection.
Quick Touch-Up Tricks
Between deep cleanings, use these shortcuts:
- Wipe spills immediately with a damp cloth to prevent stains.
- Spritz vinegar-water mix weekly for dusting and disinfecting.
- Apply beeswax monthly to high-wear areas like wheels or handles.
Keep tools like microfiber cloths and soft brushes handy for spot-cleaning. A little attention goes a long way!
Conclusion
Transforming tired toys into treasures is easier than you think. With this guide, you’ve learned a safe, simple process to restore wooden toys—no expensive tools or pros needed.
Start with a less sentimental piece to build confidence. The pride of preserving family history with your own hands is priceless. Plus, DIY saves money and keeps heirlooms safe for years.
Share your results online! Tag us in before-and-after photos. Ready to begin? Grab that teddy bear—it’s time for a makeover! For more ideas, personalize your wooden toys next.
FAQ
Why should I restore my child’s wooden toys?
Well-loved toys hold sentimental value, and restoring them keeps cherished memories alive. A refreshed finish also protects the wood, ensuring the toy lasts longer.
How do I know if my toy needs restoration?
Check for scratches, dirt buildup, or faded color. Minor wear can often be fixed with cleaning and polishing, while deep damage may require refinishing.
What safe cleaning products should I use?
Stick to non-toxic options like diluted vinegar, mild soap, or baking soda paste. Avoid harsh chemicals to keep the toy safe for kids.
Can I fix small scratches at home?
Yes! Rubbing a walnut or a baking soda paste over tiny scratches can help. For deeper marks, light sanding with fine-grit paper works.
What’s the best way to polish wooden toys?
Use natural polishes like beeswax or olive oil. Apply a small amount with a microfiber cloth and buff gently for a smooth shine.
How do I protect the toy after restoring it?
Apply a food-safe wax or mineral oil. These coatings shield the wood and are safe if kids put the toy in their mouths.
How often should I maintain the toy’s finish?
A quick wipe-down every few weeks helps. Reapply protective wax or oil every 3-6 months, depending on use.
What’s the best way to store wooden toys?
Keep them in a dry place away from direct sunlight. Avoid damp areas to prevent warping or mold.