Nothing beats the satisfaction of bringing damaged wood back to life. Whether it’s a vintage dresser or your favorite hardwood floors, small imperfections don’t have to mean the end of their beauty. With the right tools and a little patience, you can restore them like new.
Take it from someone who turned a $50 Facebook Marketplace find into a stunning showpiece—wood filler and a steady hand work wonders. You don’t need professional skills, just a willingness to learn. This guide will walk you through simple steps to fix those frustrating nicks and dings.
Key Takeaways
- Restoring wood is rewarding and cost-effective.
- Basic DIY skills are all you need for success.
- Quality materials like wood filler make a big difference.
- Minor fixes can save furniture from being discarded.
- Safety matters, especially when working on floors.
Why Repairing Chipped Wood Matters
Every scratch tells a story, but restoring your furniture keeps that story alive. Left unchecked, minor damage can weaken the structure over time. Sharp edges or splinters aren’t just unsightly—they’re safety hazards, especially in busy homes.
Think of that chip as a chapter in your piece’s history. A mid-century modern dresser, once destined for the landfill, sold for triple its value after a careful restoration. Preservation pays off, whether it’s sentimental or financial.
Repairing broken corners costs far less than replacement. A hotel’s discarded armoire became a showstopper with $20 in supplies. Plus, keeping furniture out of landfills aligns with today’s sustainable decorating trends.
Your home feels more inviting when every piece looks cared for. My own restored dresser became the entryway’s focal point—proof that small fixes create big impact. Tackle the issue now, and you’ll avoid costly repairs later.
Tools and Materials You’ll Need
Quality materials make all the difference when fixing imperfections in wood. Whether you’re tackling a kitchen table or hardwood floors, having the right supplies ensures a seamless repair. Below, we’ve split essentials by project type for clarity.
Furniture Essentials
Minwax High-Performance Wood Filler is a game-changer—it dries rock-hard in 30 minutes and accepts stains beautifully. For painted pieces, Zinsser Shellac Primer creates a durable base that prevents bleed-through.
Keep these extras handy:
- Vaseline: A budget-friendly release agent for molds or excess filler.
- Utility knives: Sharper than specialty scrapers for precise trimming.
- Sandpaper: Start with 80-grit for shaping, finish with 120-grit for smoothness.
Flooring Fixes
For floors, hard wax sticks paired with a heating iron work wonders. Melt the wax into gaps, then sculpt it to match the grain. Unlike putty, wax won’t shrink or crack underfoot.
Pro tip: Test colors on a scrap piece first. Flooring stains vary, and a perfect match hides repairs best.
With these tools, even complex projects become manageable. Now, let’s assess the damage.
Assess the Damage
A careful inspection saves hours of frustration later in the process. Start by examining the area under bright light to spot hidden cracks or splinters. Document issues with phone photos—they help track progress and reveal subtle flaws.

Small Chips vs. Large Breaks
Tiny nicks often need just filler, while deep breaks may require structural support. Use the fingernail test: If your nail catches, the damage needs attention. For hairline cracks, a magnifying glass reveals whether the shape is superficial or runs deeper.
Pro tip: Painter’s tape marks repair boundaries. Skipping this step once left me sanding too far into pristine wood.
Checking for Loose Veneer
Press gently near corners—bubbling or flexing signals adhesive failure. A utility knife lifts edges to check for rot or pests. If veneer crumbles, replacement may beat repair.
When to walk away: Water stains with a moisture meter reading above 18% often indicate irreversible swelling. Similarly, termite tunnels mean professional help is safer.
Prepping the Area for Repair
Proper prep work turns good repairs into flawless ones. Rushing this step risks filler peeling or stains mismatching. Invest time here, and your results will look professional.
Cleaning and Sanding
Simple Green is a degreasing hero—it stripped decades of grime from a 1950s cabinet I restored. For tight corners, wrap a Q-tip in cloth dipped in cleaner. This targets grime without oversaturating the wood.
The Corner Cat sander saves time on edges. Move in small, circular motions to avoid over-removal. Always sand with the grain, and stop when the surface feels even (the 3-Finger Test works best).
Creating a Smooth Base
Apply a small amount of shellac primer if painting later. It seals pores so filler dries rock hard. Test adhesion by pressing masking tape onto a scrap piece—if it lifts, sand again.
Pro tip: Humidity affects dry time. Work in a room under 70°F for ideal curing. Cardboard shields adjacent surfaces from stray filler or dust.
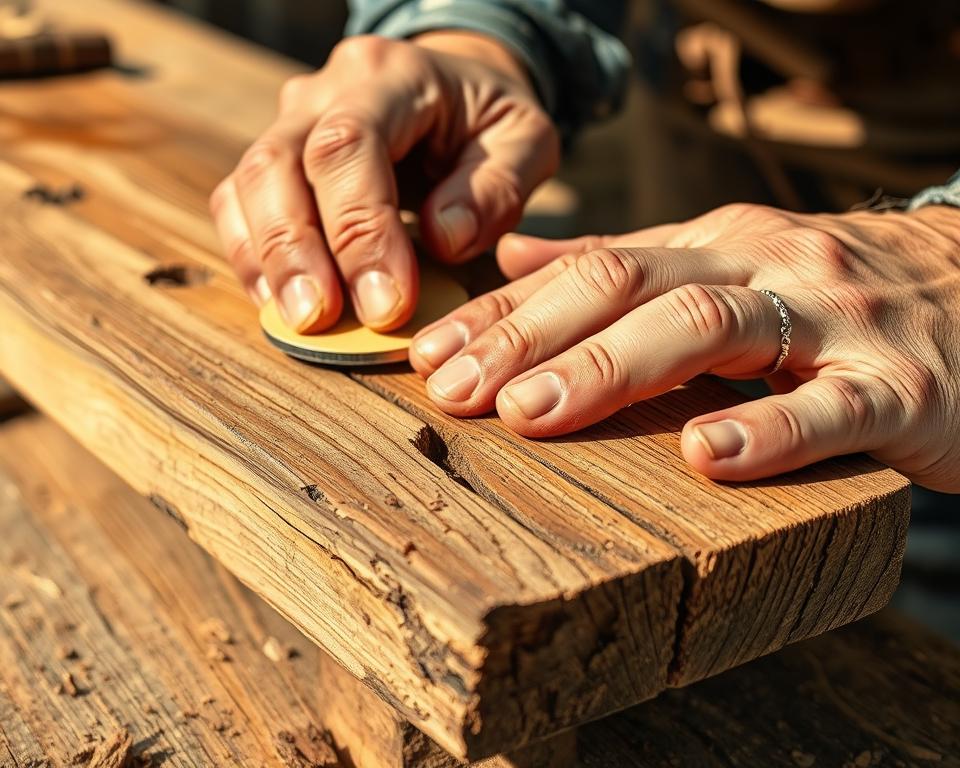
Filling the Chipped Edge
The right filling technique can make or break your restoration project. For furniture, wood filler is your best ally, while floors often need wax for flexible, durable results. Let’s break down each method.
Using Wood Filler (Furniture)
Start with thin layers for deep repairs. Pack wood filler tightly to avoid air pockets. A utility knife helps carve excess before it fully hardens—think of it as sculpting.
Pro tip: Use an old credit card as a squeegee. It spreads filler evenly and removes extra material in one swipe. Match the filler’s expansion rate to the wood to prevent cracks later.
Using Hard Wax (Flooring)
For floors, melt wax sticks with a heating iron. Press it into gaps, then sculpt to mimic the grain. Unlike filler, wax flexes underfoot without cracking.
Test colors on scrap wood first. A perfect match hides repairs completely. Buff the area lightly to blend with the surrounding finish.
Whether you’re fixing a repair broken chair leg or a scratched floor, patience and the right materials ensure flawless results.
Shaping and Sanding the Repair
The magic of restoration happens in the shaping and sanding stage. This is where rough patches blend seamlessly into the original surface. With the right approach, even deep imperfections disappear.

Tools for Perfect Contours
Microplanes outperform traditional rasps for fine-tuning curves. Their razor-sharp blades remove material evenly without tearing fibers. For tight spots, wrap sandpaper around a wine cork or dowel—it’s a DIY lifesaver.
Pro tip: Use the Shadow Test. Shine a light across the surface—uneven shadows reveal lumps needing attention.
Avoiding Over-Sanding
Start with 80-grit paper for shaping, then progress to 120-grit for smoothness. Feather the edges by sanding outward in gentle strokes. Over-sanding flattens profiles, but a dab of filler can salvage minor mishaps.
- Dust hacks: Tape a vacuum nozzle near your workspace to keep particles under control.
- Finger protection: Use a sanding block to prevent blisters on long projects.
- Final check: Run your fingertips across the repair—it should feel indistinguishable from the surrounding area.
Great projects hinge on patience during this phase. Rushing creates dips or ridges, but careful work yields invisible repairs.
Matching the Color and Finish
The final touch that brings your restoration to life is perfect color matching. Whether staining, painting, or blending, the right technique hides flaws and preserves your piece’s character.
Staining or Painting
Custom stains can mimic aged wood. Brewed tea or coffee adds warm undertones to light fillers. For modern pieces, Sherwin-Williams Iron Ore offers a rich, neutral base.
Test colors on scrap wood first. The squint test helps—view the repair from a distance to spot mismatches. If the tone feels off, layer translucent acrylics until it blends.
Blending with Acrylics
Artist-grade acrylics excel for subtle adjustments. Dab diluted paint with a sponge to replicate grain patterns. Seal with a compatible topcoat to lock in the finish.
Pro tip: Use a smartphone color picker app to analyze the original hue. Aging new paint with a light sanding mimics natural patina.
- Spray vs. brush: Spray lacquer dries faster, but brushes work better for textured surfaces.
- Protect adjacent areas: Masking tape prevents accidental smudges during touch-ups.
- Topcoat chart: Verify compatibility between stains and sealants to avoid clouding.
Pro Tips for a Flawless Repair
Small details separate good repairs from professional-grade results. Whether you’re a DIY enthusiast or a first-timer, these expert tricks ensure seamless fixes every time.
Release Agents: Vaseline vs. WD-40
Vaseline works best for mold-making or excess filler cleanup. Its thick consistency prevents seepage into porous wood. For sticky tools, a spritz of WD-40 lifts residue without damaging surfaces.
Pro tip: Apply release agents sparingly. Too much can weaken adhesion or stain unfinished wood.
Mastering Work Time and Drying
Most fillers cure rock hard in 30 minutes, but humidity slows this. Speed up drying with a dehumidifier or fan—just avoid direct heat, which can crack the material.
- Two-minute warning: Shape filler before it skins over for smoother sanding later.
- Test readiness: Press a fingernail lightly—no indentation means it’s set.
- Storage hack: Wrap mixed filler in plastic wrap to extend work time by 10 minutes.
Walk away once filler is applied. Disturbing it mid-cure creates bumps that require rework.
Conclusion
Your first DIY repair proves that small efforts create big transformations. That scratched table? Now a conversation piece. The scuffed floor? Seamlessly restored. You’ve saved money and gained skills—win-win.
Start simple. A quick wax touch-up or wood filler application builds confidence. Share your results—social media loves before-and-after wins. Teach kids or friends; skills multiply when passed on.
Stay ahead with light maintenance checks every season. For complex issues, pros handle structural concerns safely. But most fixes? You’ve got this.
Ready for your next project? Grab materials, pick a step, and begin. Every expert started where you are now.
FAQ
What’s the best way to fix small chips in furniture?
For minor damage, use wood filler. Apply a small amount, shape it with a putty knife, and sand it smooth once dry. Match the color with stain or paint for a seamless look.
How do I repair broken corners on wooden floors?
Hard wax sticks work best for flooring. Melt the wax, press it into the damaged area, and carve it to match the original shape. Buff it lightly for a smooth finish.
Can I use regular paint to cover repairs?
Acrylics or specialized wood paints blend better. Test colors on scrap wood first to ensure a perfect match before applying to the repaired spot.
What tools do I need for shaping repaired edges?
A utility knife, fine-grit sandpaper, and a small chisel help contour the filler or wax. Work slowly to avoid removing too much material.
How long should I wait before sanding wood filler?
Check the product label—most fillers need 2–4 hours to harden. For deep repairs, waiting overnight ensures durability.
What’s a quick fix for loose veneer?
Apply wood glue underneath, clamp it flat, and wipe excess glue with a damp cloth. Let it dry completely before refinishing.
How do I prevent filler from sticking to tools?
Coat blades or spatulas with a release agent like Vaseline. This makes cleanup easier and keeps edges sharp.
Can I repair deep breaks without replacing the piece?
Yes! For large gaps, layer filler in stages, letting each application dry. Reinforce weak spots with epoxy for strength.